Should you choose this app?– GarageBand is currently one of the best Digital Audio Workstations in the music industry. It is quite intriguing how an application this compact offers users the infinite potential to create appealing music that is fresh and out of the box. The software has been extracted from the all-encompassing Logic Pro X software. Developed by Apple INC, GarageBand also provides users the much-required security. It can be easily downloaded from the Apple Store free of cost. The user interface of the application is such that from novice to professionals, users of all competencies can create amazing tracks and compose their music. Detailed steps for the same are laid out below in this guide.
GUARD TO START WITH MAKING AND COMPOSING MUSIC:
To start creating music, launch the GarageBand software on your device. As it runs on a PC, iPad, or iPhone, you can choose either to start making your project. The interface and control positions might differ a little for each device but the fundamental structure of GarageBand remains the same.
For windows users this guide will refer to the PC version of GarageBand: https://garagebandonpc.com
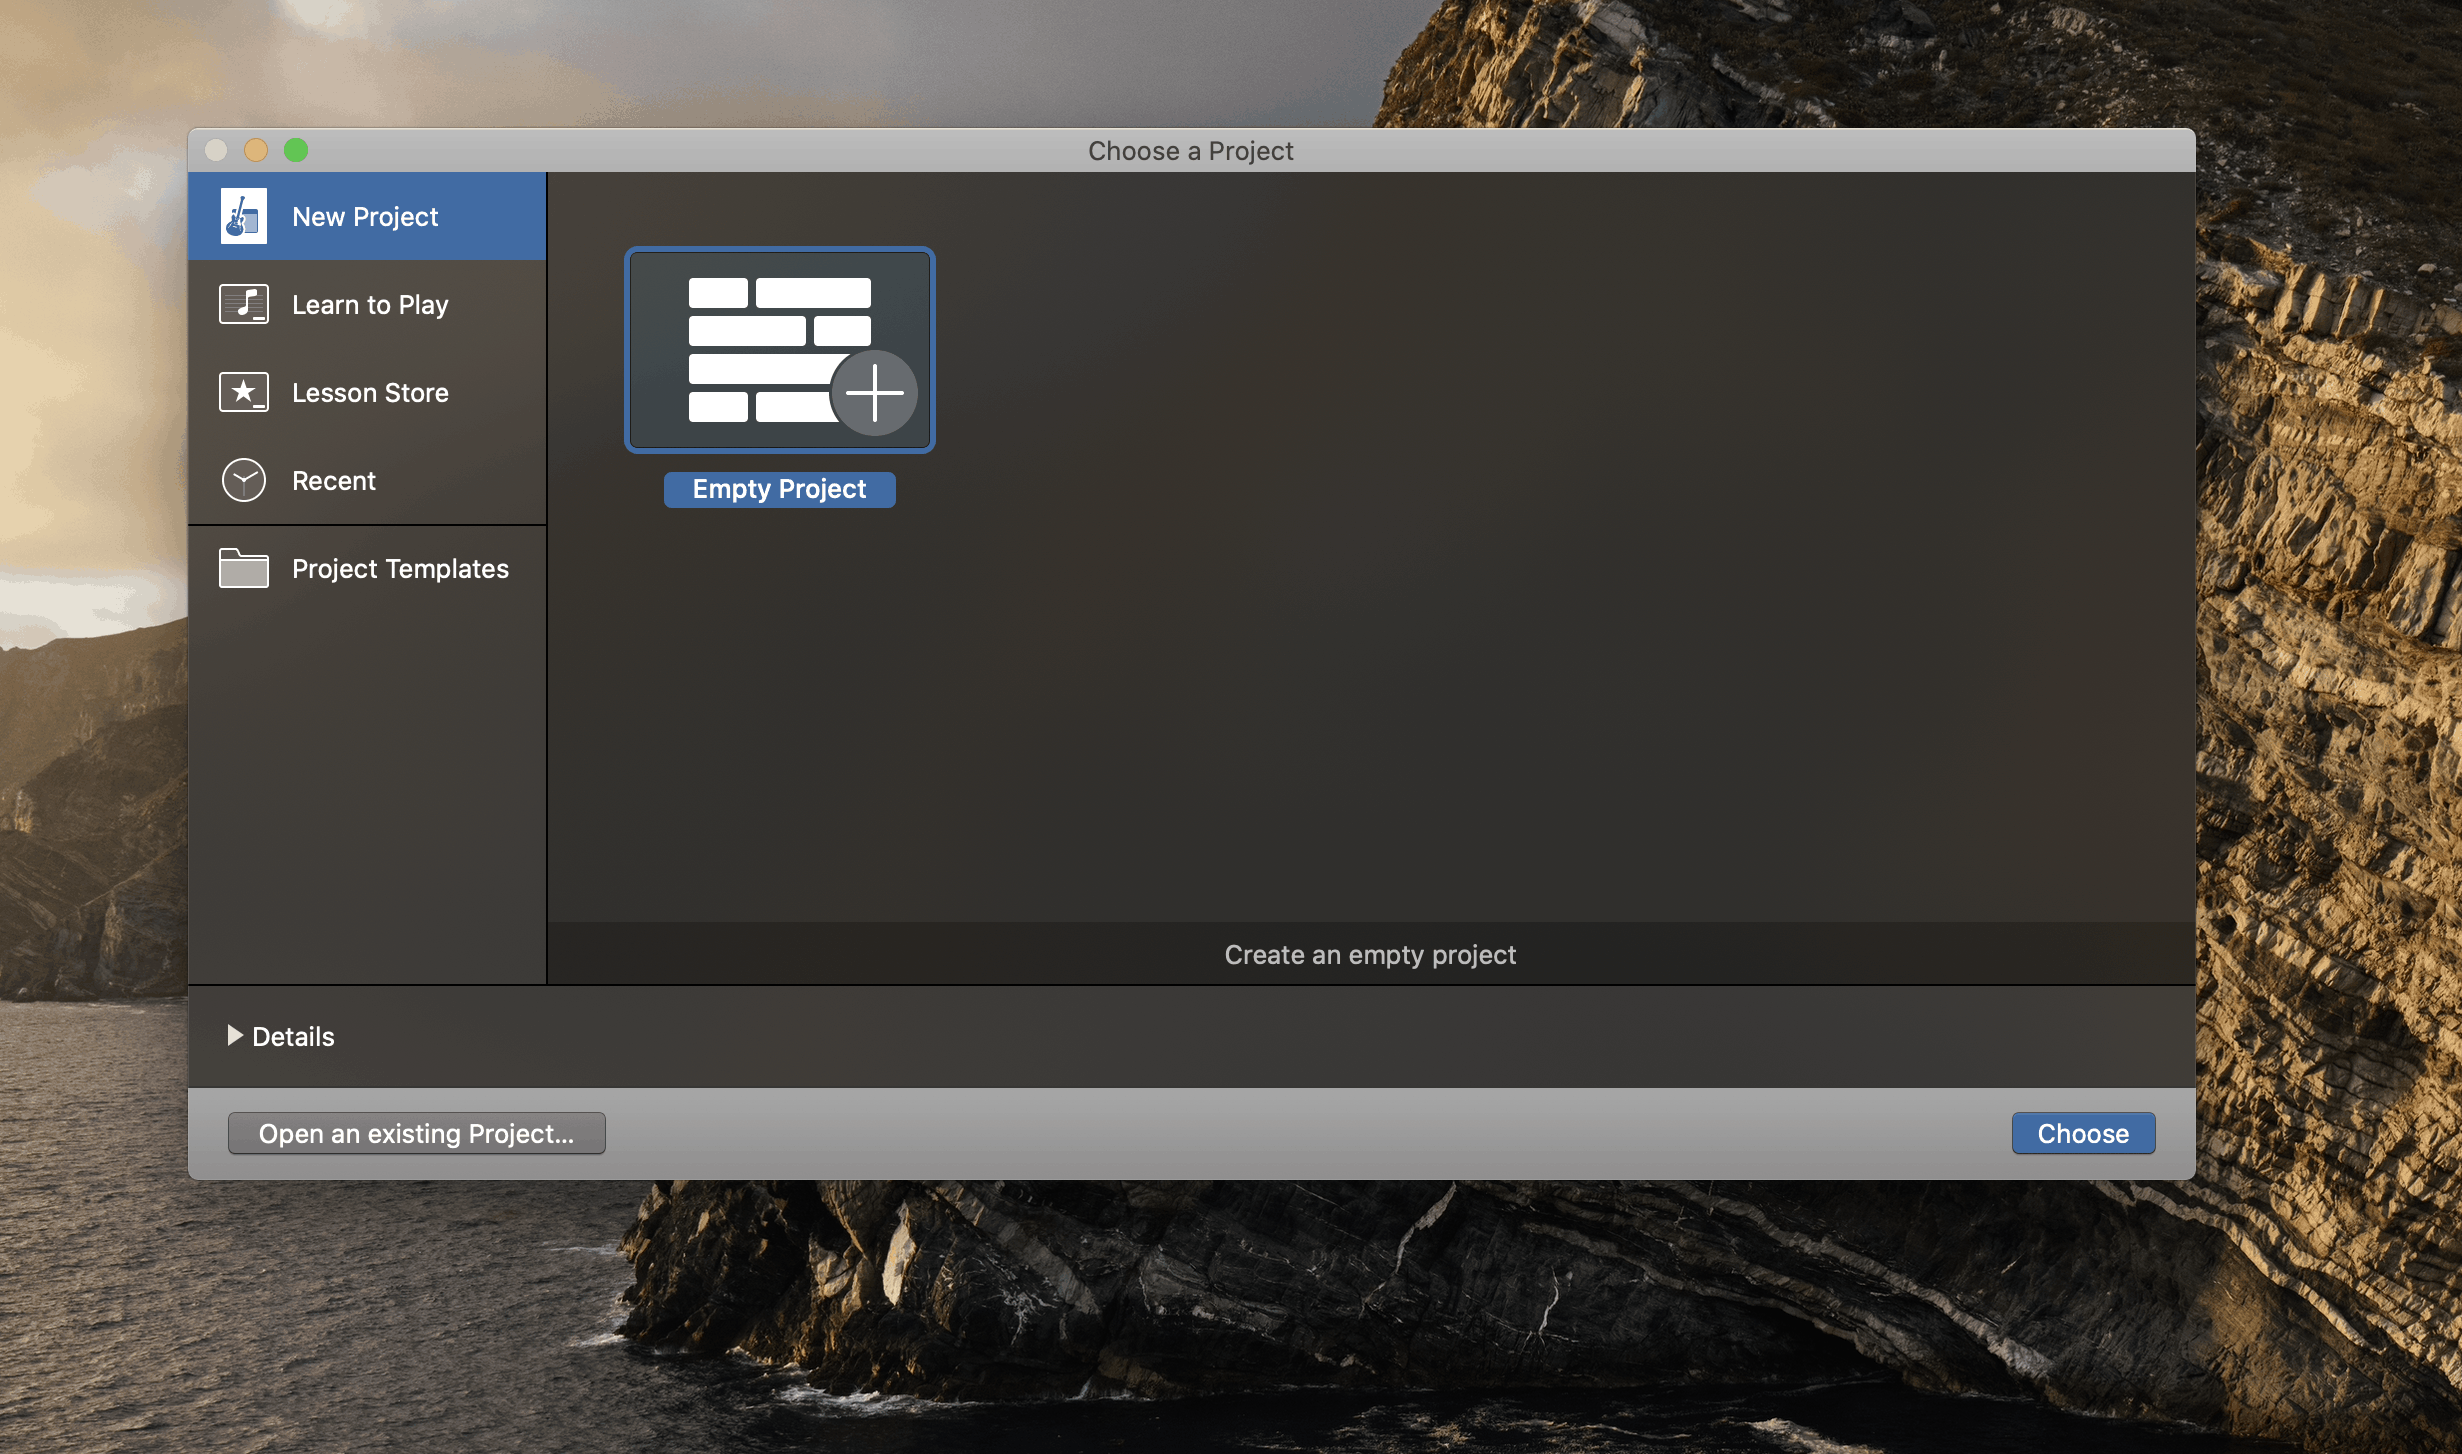
Click on the ‘New project’ option as this guide will tell you how to create a new song from scratch. If you want to import certain tracks or melodies from an existing track, you can do so by clicking on the ‘Import’ button and choosing the project you want to import from. After you have opened a new project, you will get four track selection options.
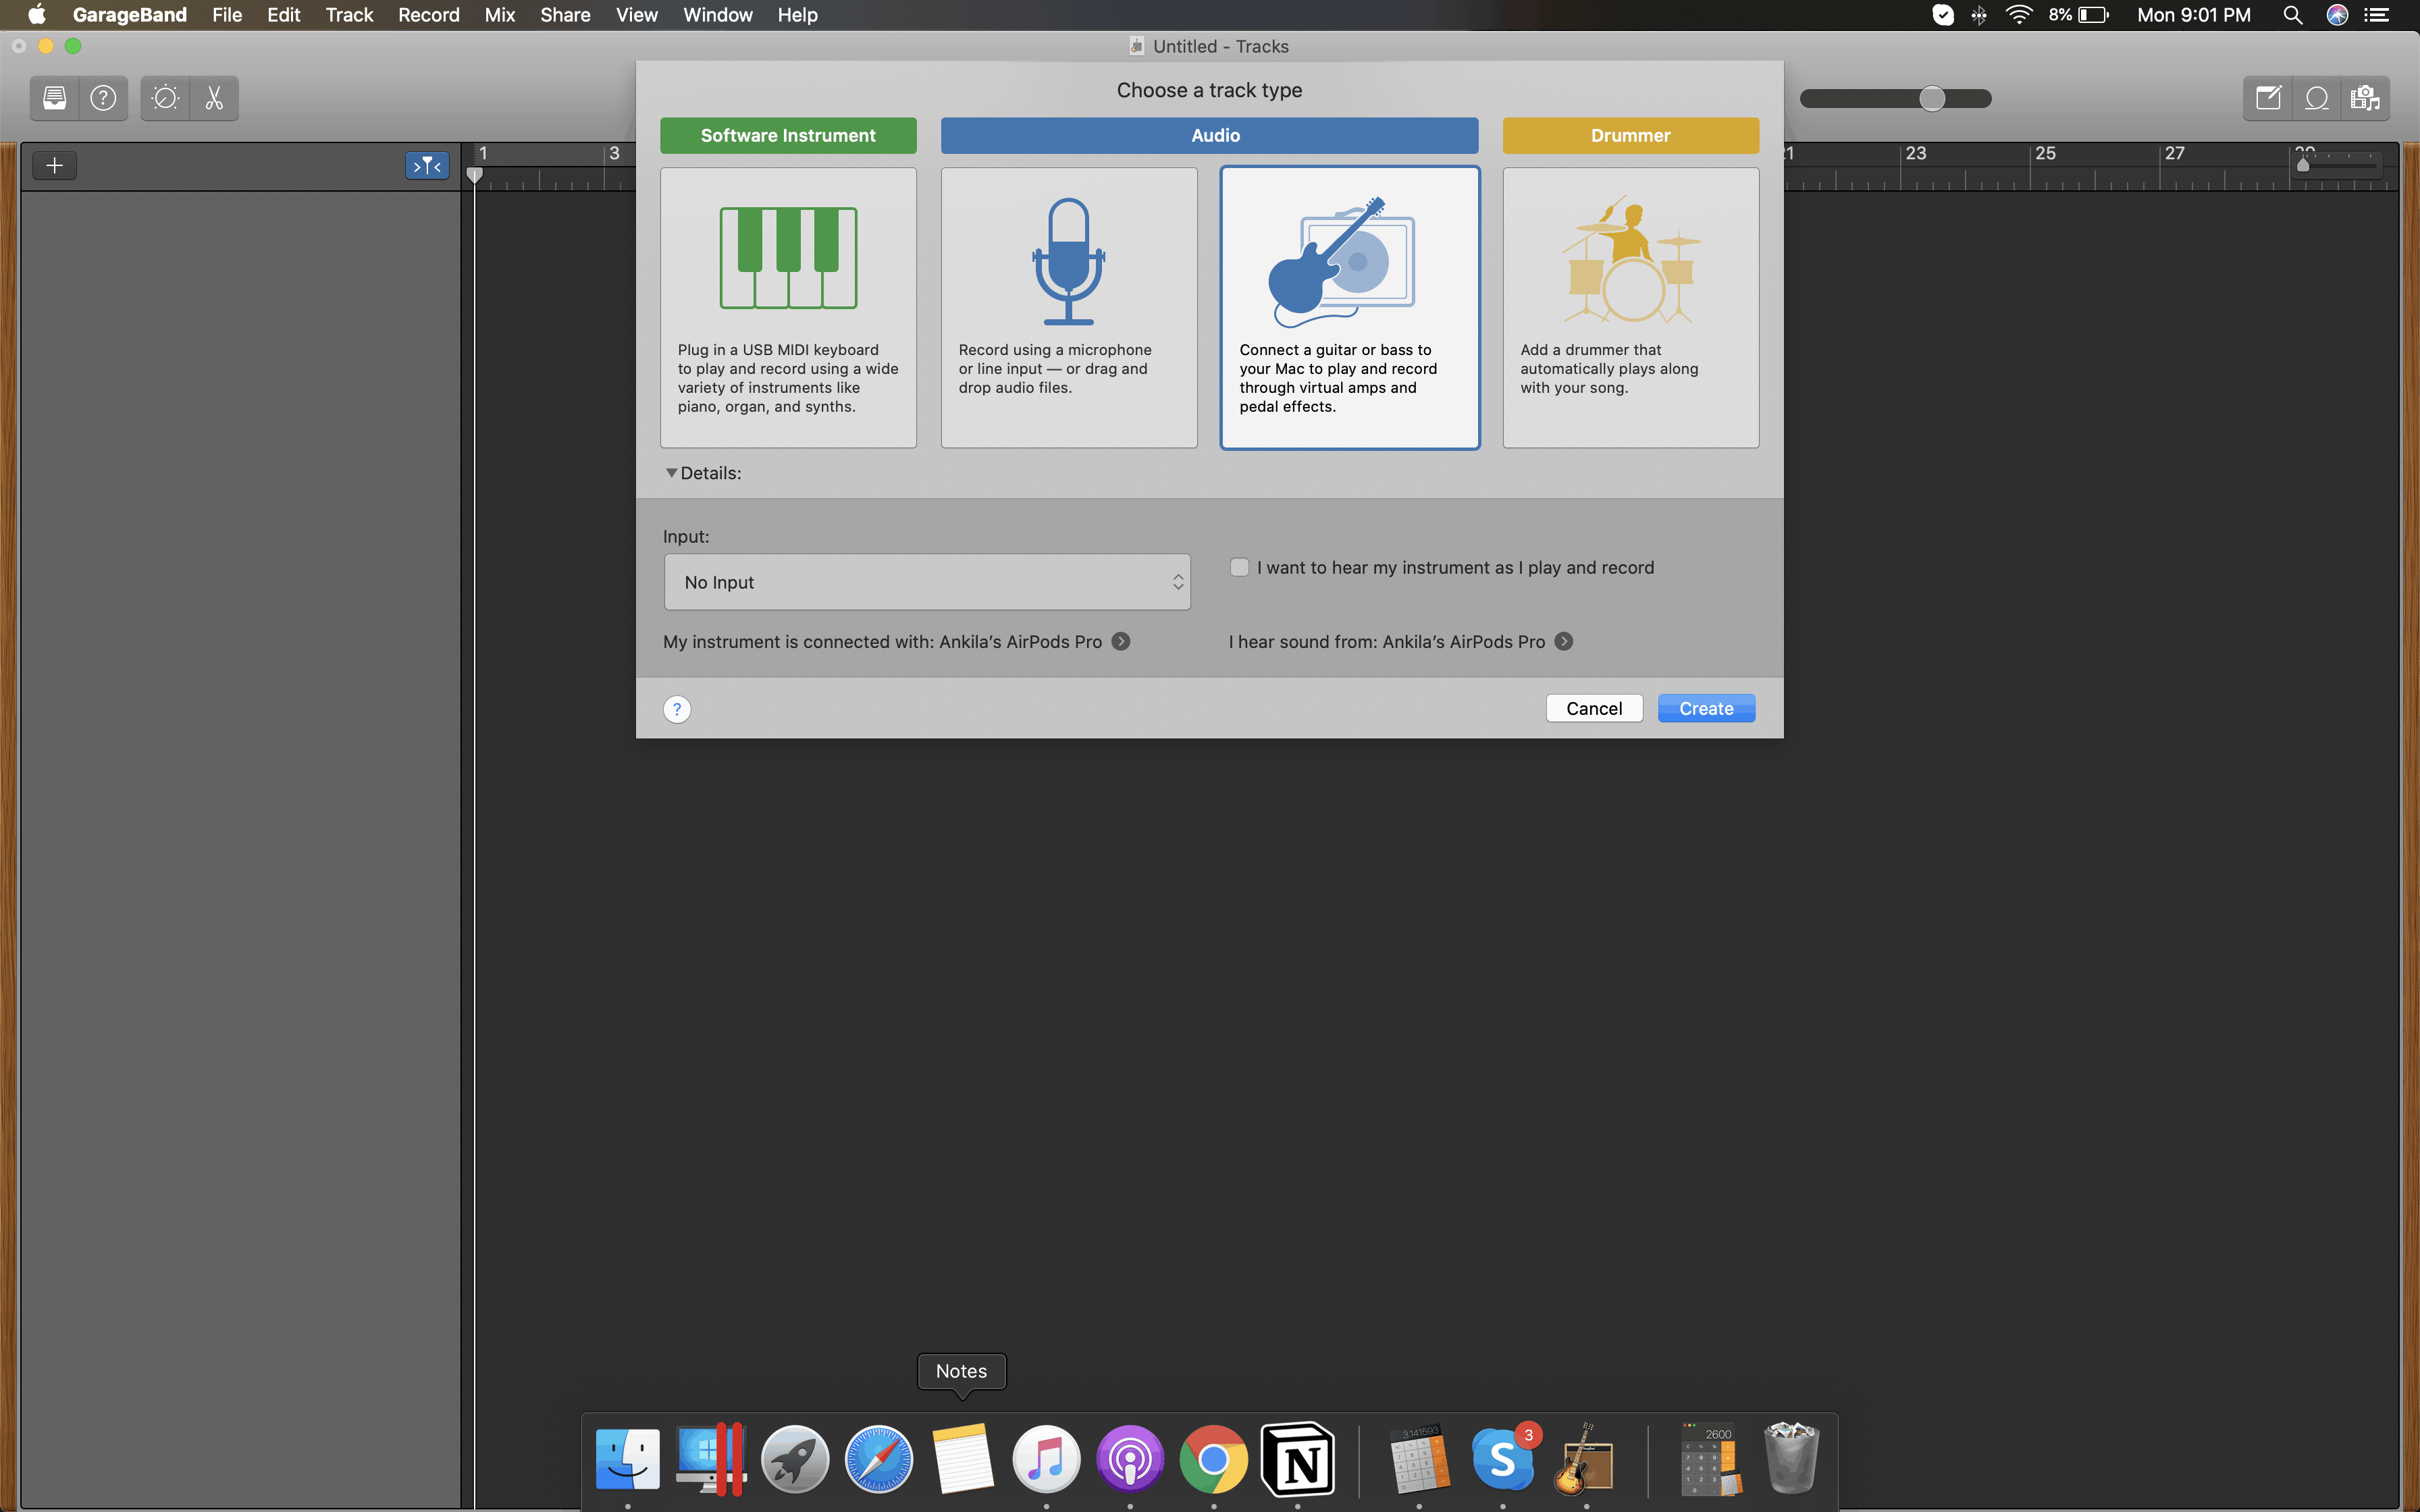
The first option is inserting a MIDI track (software instrument). The next two options are plugging in a microphone to record the vocals track or a guitar (both lead and bass) to record the melody or the bassline. All other plugin instruments can also be connected and recorded by choosing this track. The last option is that of a virtual drummer track. The details of which will be discussed later in the guide.
A song composition contains four major sections. The melody, the bassline, percussion, and layering. It is always easier to begin with the layer section. For this, select the Software Instrument track. Choosing this track does not necessarily mean you have to have a MIDI instrument on you. The Musical Typing feature of GarageBand is particularly well-known for such situations. Using this feature, you can convert your device keyboard into a MIDI keyboard. Go to Preferences > Musical Typing to enable this feature.
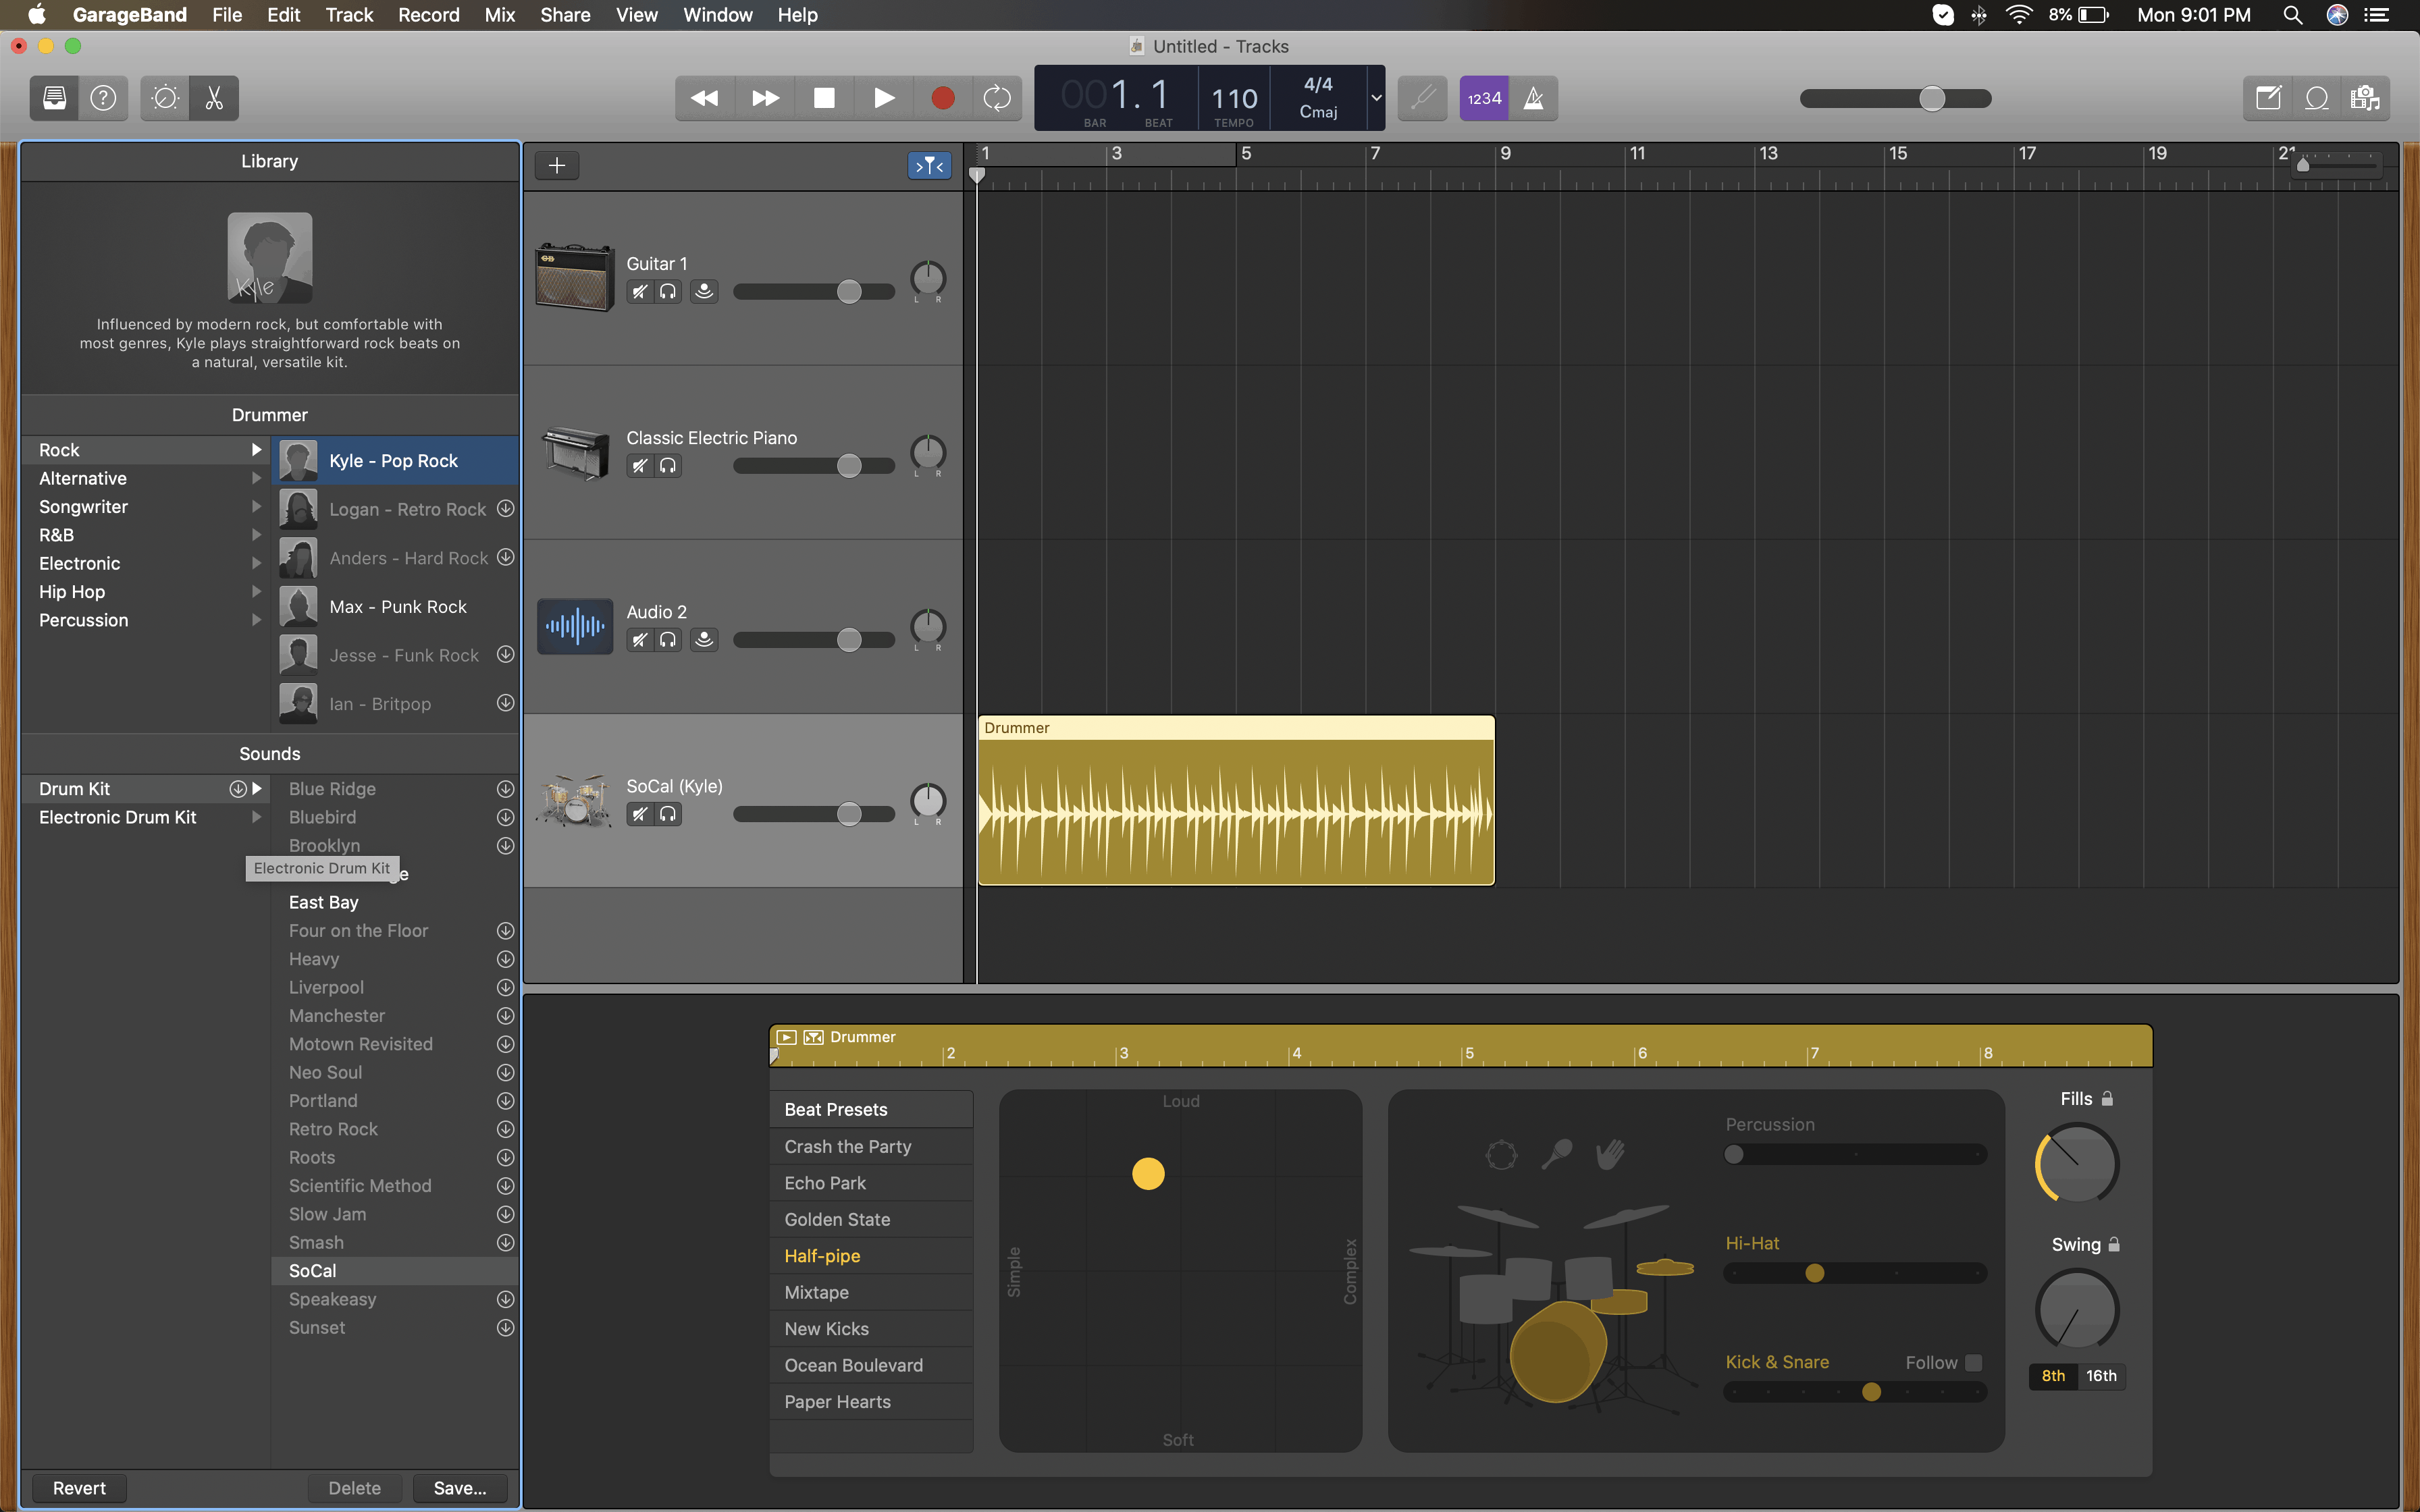
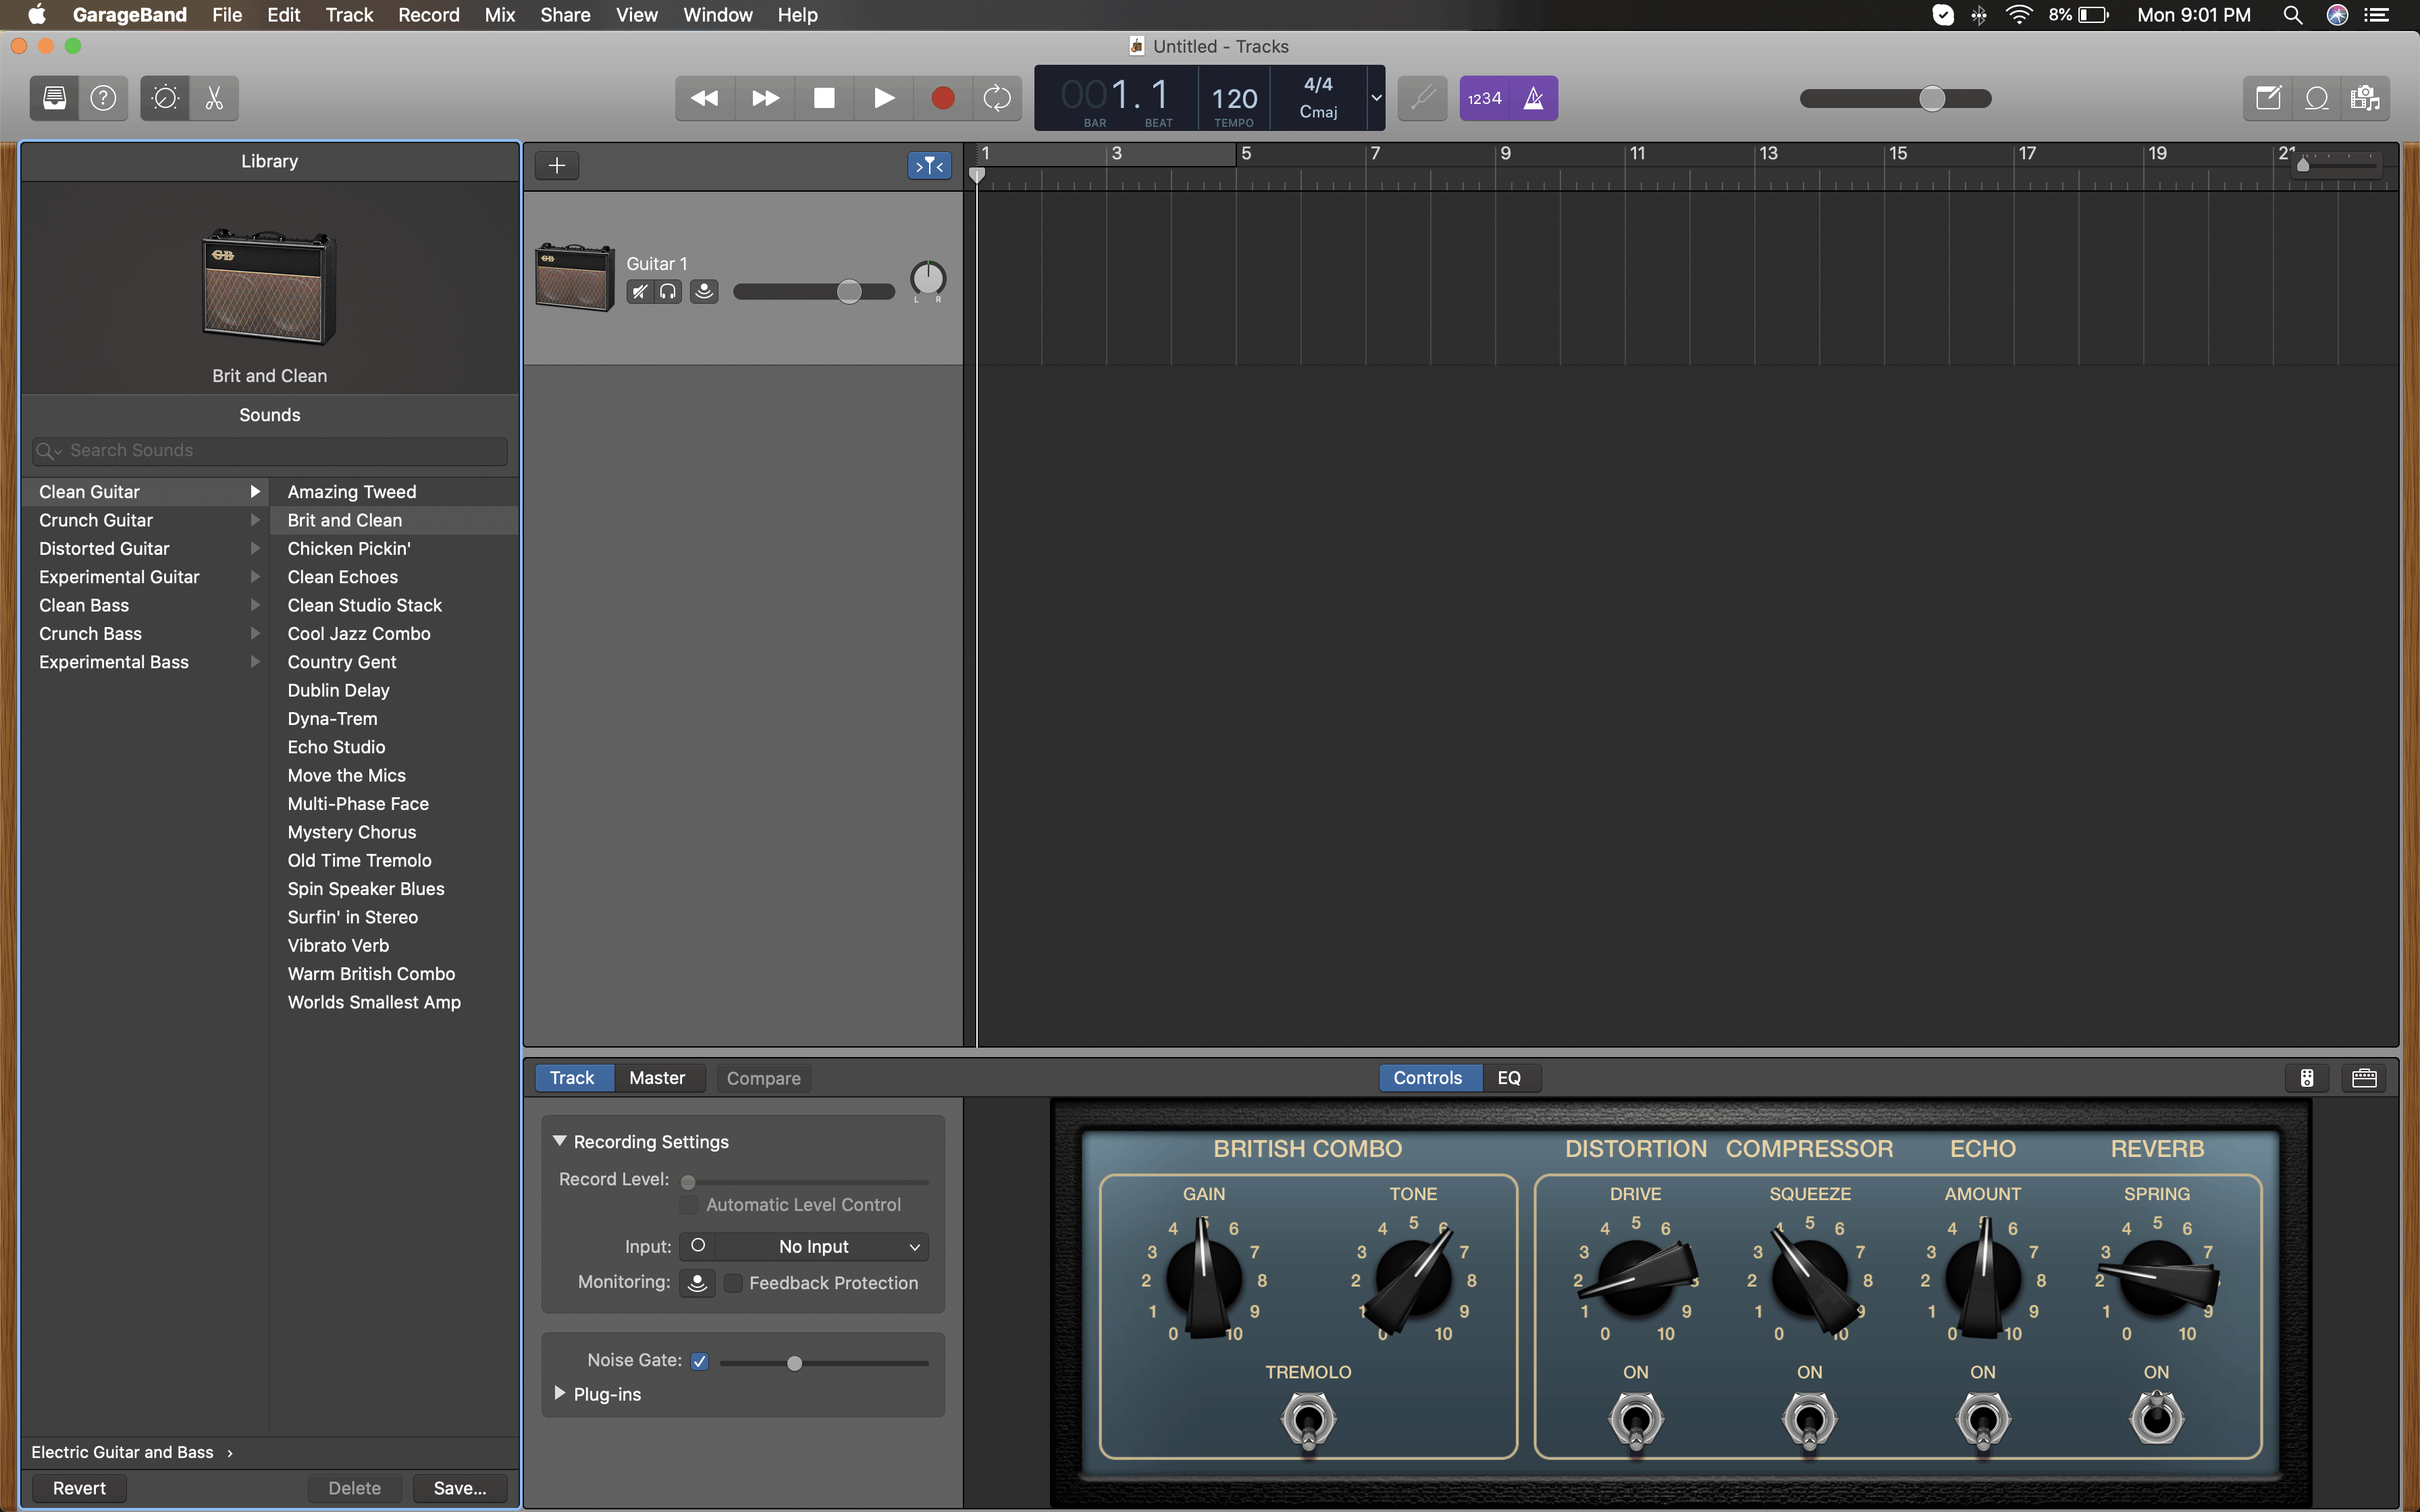
The MIDI track will open up with a panel to the left and a panel down below. The panel to the left of the track is the Music Library that has in it stored tones of various musical instruments. Starting from Guitar tones to classical piano to bass tones, the library has it all and more. The panel down below is the control panel or the mixer. It has knobs for the basic music effects like Bell, Treble, Drive, bass Volume, Ambience, Gain, and Reverb. A section of it also contains the Keyboard Sensitivity slider that becomes relevant when the Musical Typing feature is used.
As we will be recording a layer, select Synthesizer > Pad from the library. Choose a pad (layer) tone of your choice. The media player on top of the window has the record button on it. When you are ready, record the layer section of your composition. The Key Signature and Metronome options will help you keep your track on beat and scale. It will be quicker if the mixing is done when all the tracks are ready.
Moving on to the next track that will be the melody part of the composition, depending on whether you want to play the melody on the MIDI or plug in your guitar, choose the Track type. Let us use a guitar to explore the range of facilities offered by GarageBand. Use an audio interface to plug in your guitar into the system and select the Guitar Track. Switch on the metronome. To select the tone, if you have a processor on you, well and good. If not, you can use the GarageBand virtual amplifier to set the tone for your guitar. It is recommended to use a physical processor as tone quality is much better. Similar to the last track, click on the Record button and record your track.

The bassline of the song will also follow a similar pattern. The bassline can also be recorded with the MIDI Instrument by going to the Music Library and choosing a base tone. However, connecting a bass guitar will give you a much better effect. Plug in your bass guitar by choosing a plugin track. Like the last track, adjust the tones from your processor and record the bassline.
GUIDE TO COMPOSING AND MIXING OF TUNES AND TRACKS:
At this stage, if you want to add a vocals track, you can do so. Connect your microphone to the device and select the Vocal Recording track. Thereafter, record the vocals part and place it on one of the track rows.
Last but not least, the track that will bind all the other parts of your composition together is the Drummer track. Physically recording the drum sound is quite a difficult task logistically. Therefore. GarageBand has a feature called the virtual drummer. These are pre-recorded drum patterns where the time-signature can be set as required. Each virtual drummer adds a different flair to the groove. Choose a drummer from the list and set the time signature accordingly.
Once all the tracks have been recorded, it is time to mix and master the audio. The first step is to position the tracks so that they are in perfect sync. Following this comes the mixing part. As mentioned above, the Smart Controls panel with the various knobs can be put to use now. Adjust the various nuances of the tracks by twisting and turning the knobs.
It is very difficult to set out a guide for the perfect mix. It all depends on the musician’s taste. The more minutely you hear the tracks, the better you will be able to understand what best is needed for you. Fix the audio gain and the pitch if you feel your vocals track requires pitch correction (auto-tune). The pitch correction slider will be able to the left of your screen when you select the Editor button from the top left of the window.
To mix and control the individual parts of the drum, open the Automation feature from the Mix button on the menu bar. Select the drum track and several parameters displaying various drum parts will appear. Adjust the volume and boost.
Once you feel the mix is complete, listen to the entire track again. There is always something that you will have missed out initially. When the track has been perfected, export it as uncompressed. Also, save the project in the ‘My Songs’ section of GarageBand.
FINSHING OFF:
You can also try this application now on your PC and see if it fits you and your needs check the guide here.
For the visual lesson for the tutorial, check the video below. Please write to us if you have any queries and doubts.
