One of the most popular applications amid music lovers, Garageband is a comprehensive application for creating music. However, an increasing number of iOS and macOS users have uninstalled the digital audio workstation for several reasons, not having any use for it being the top most. So here is a guide to help you understand why GarageBand is on the “uninstall list” for Apple users. And if so, how to go about it.
Why Uninstall GarageBand?
Although GarageBand does not have any such limitations, for some MacBook users, it may be a space-eating app. Some of its supporting files are massive in size and hence utilize much of the hard disk space. Especially, the Loop Library and the Instrument Library claim the highest space in a MacBook. It is one of the only reasons that make users withdraw from using the app.

However, the most common reason to uninstall or delete GarageBand files from MacBook is if the app is not being used for the essential goal of recording music and podcasts. Moreover, for MacBook Air users, the small solid-state drive of the device forces them to uninstall GarageBand to recover the storage space.
Everything you should know before removing GarageBand:
Before getting to uninstalling GarageBand from Mac, let us understand how the uninstallation procedure in a MacBook works. Ideally, most of the applications in Mac are bundled separately, containing all the executable and any associated resources for the app. Therefore, the user can easily uninstall any software that is not required, without much hassle.
Even though it is necessary to understand even after basic uninstallation, a stand-alone software may transmit some of its configuration files at varied locations. These files are rarely large-sized. However, not removing them may still affect the functioning of your MacBook. In any case, it is necessary to clean out the junk files from your MacBook for complete removal.
Now a lot of times users face inconvenience when confronted with a query, i.e., how to delete GarageBand. There are two ways of removing the application; one, by manual procedure, and second, by using a third-party application. So, let us discuss the effective steps to uninstall GarageBand from your MacBook.
How to remove GarageBand manually?-
To remove or uninstall GarageBand from your Mac, follow the below steps:
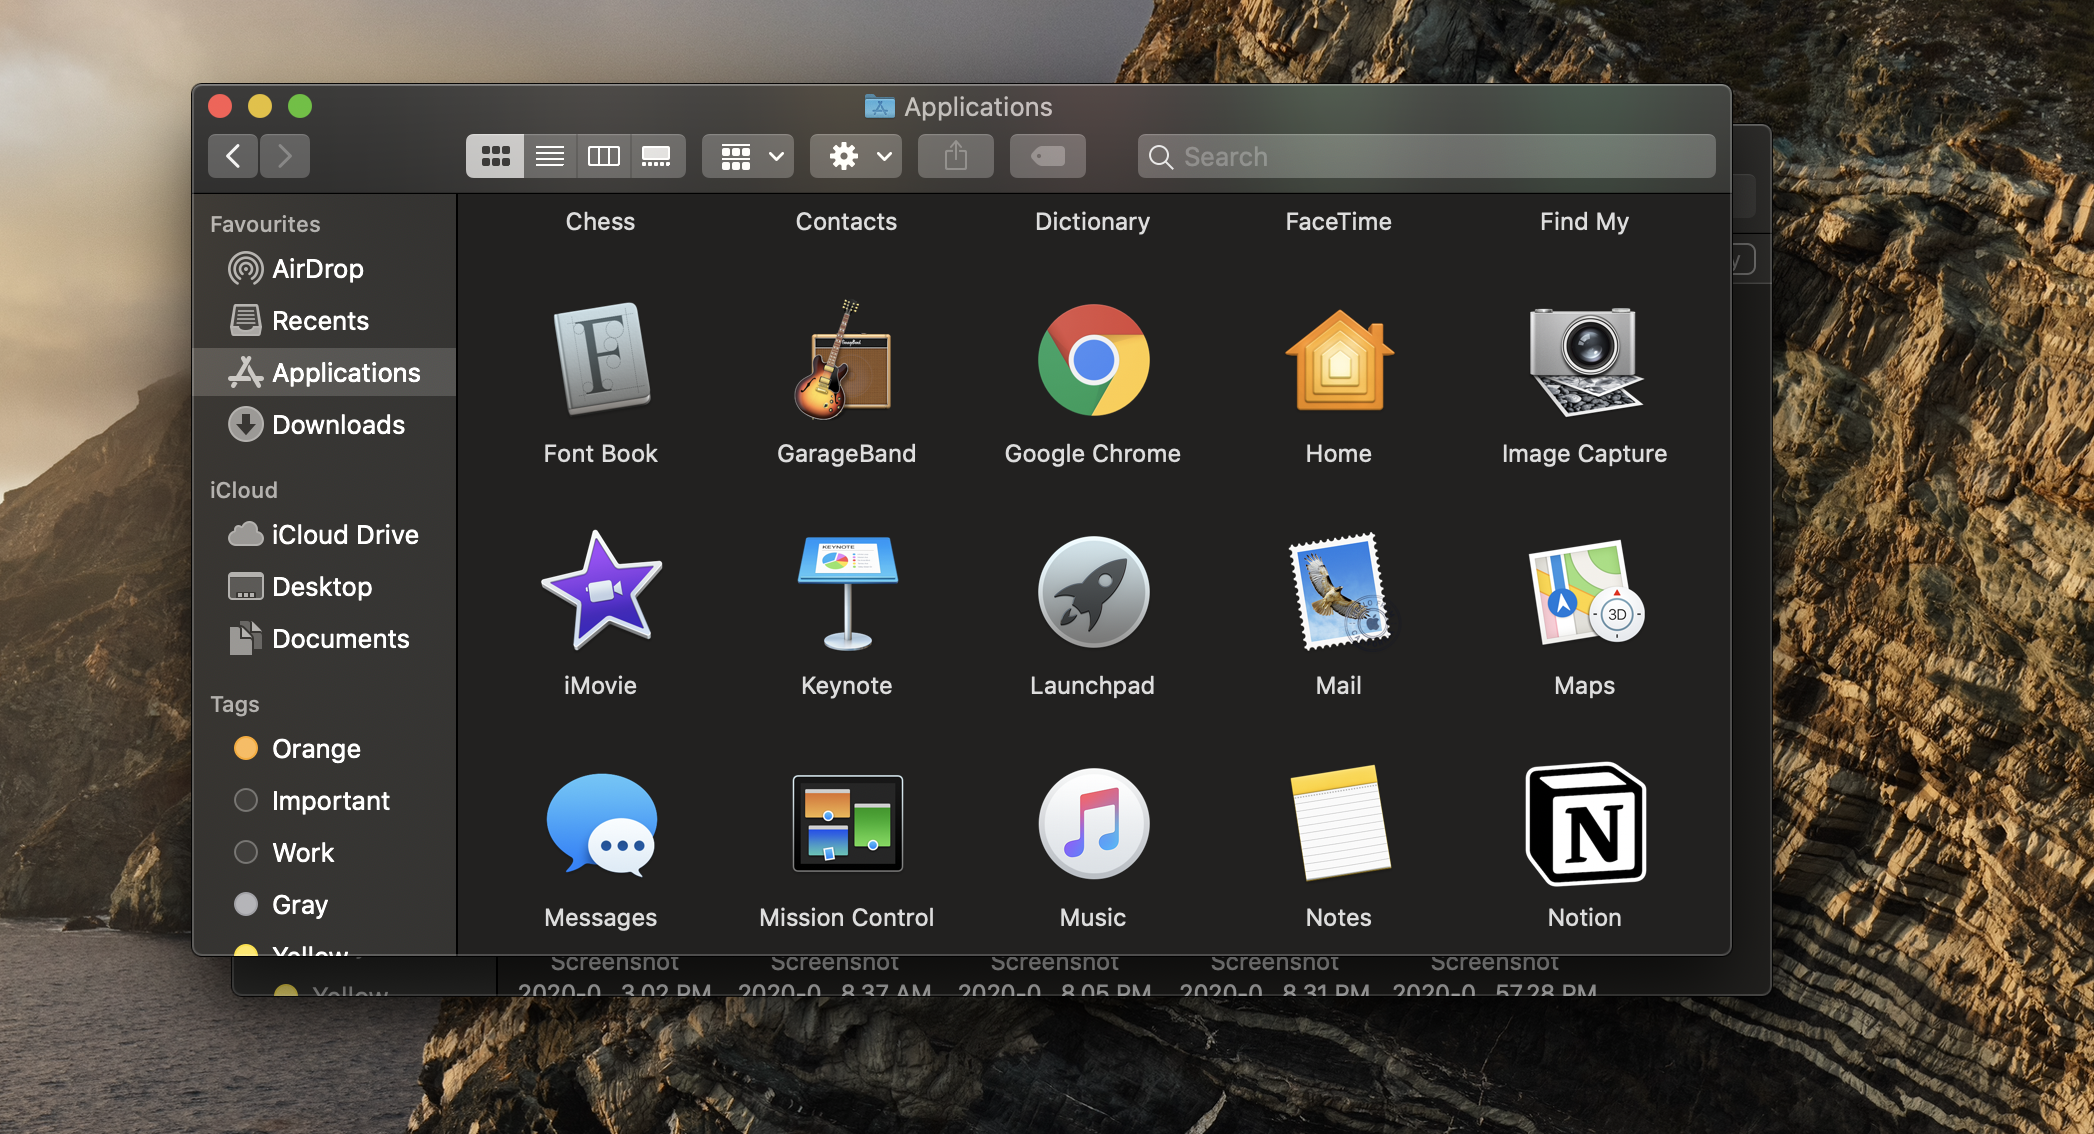
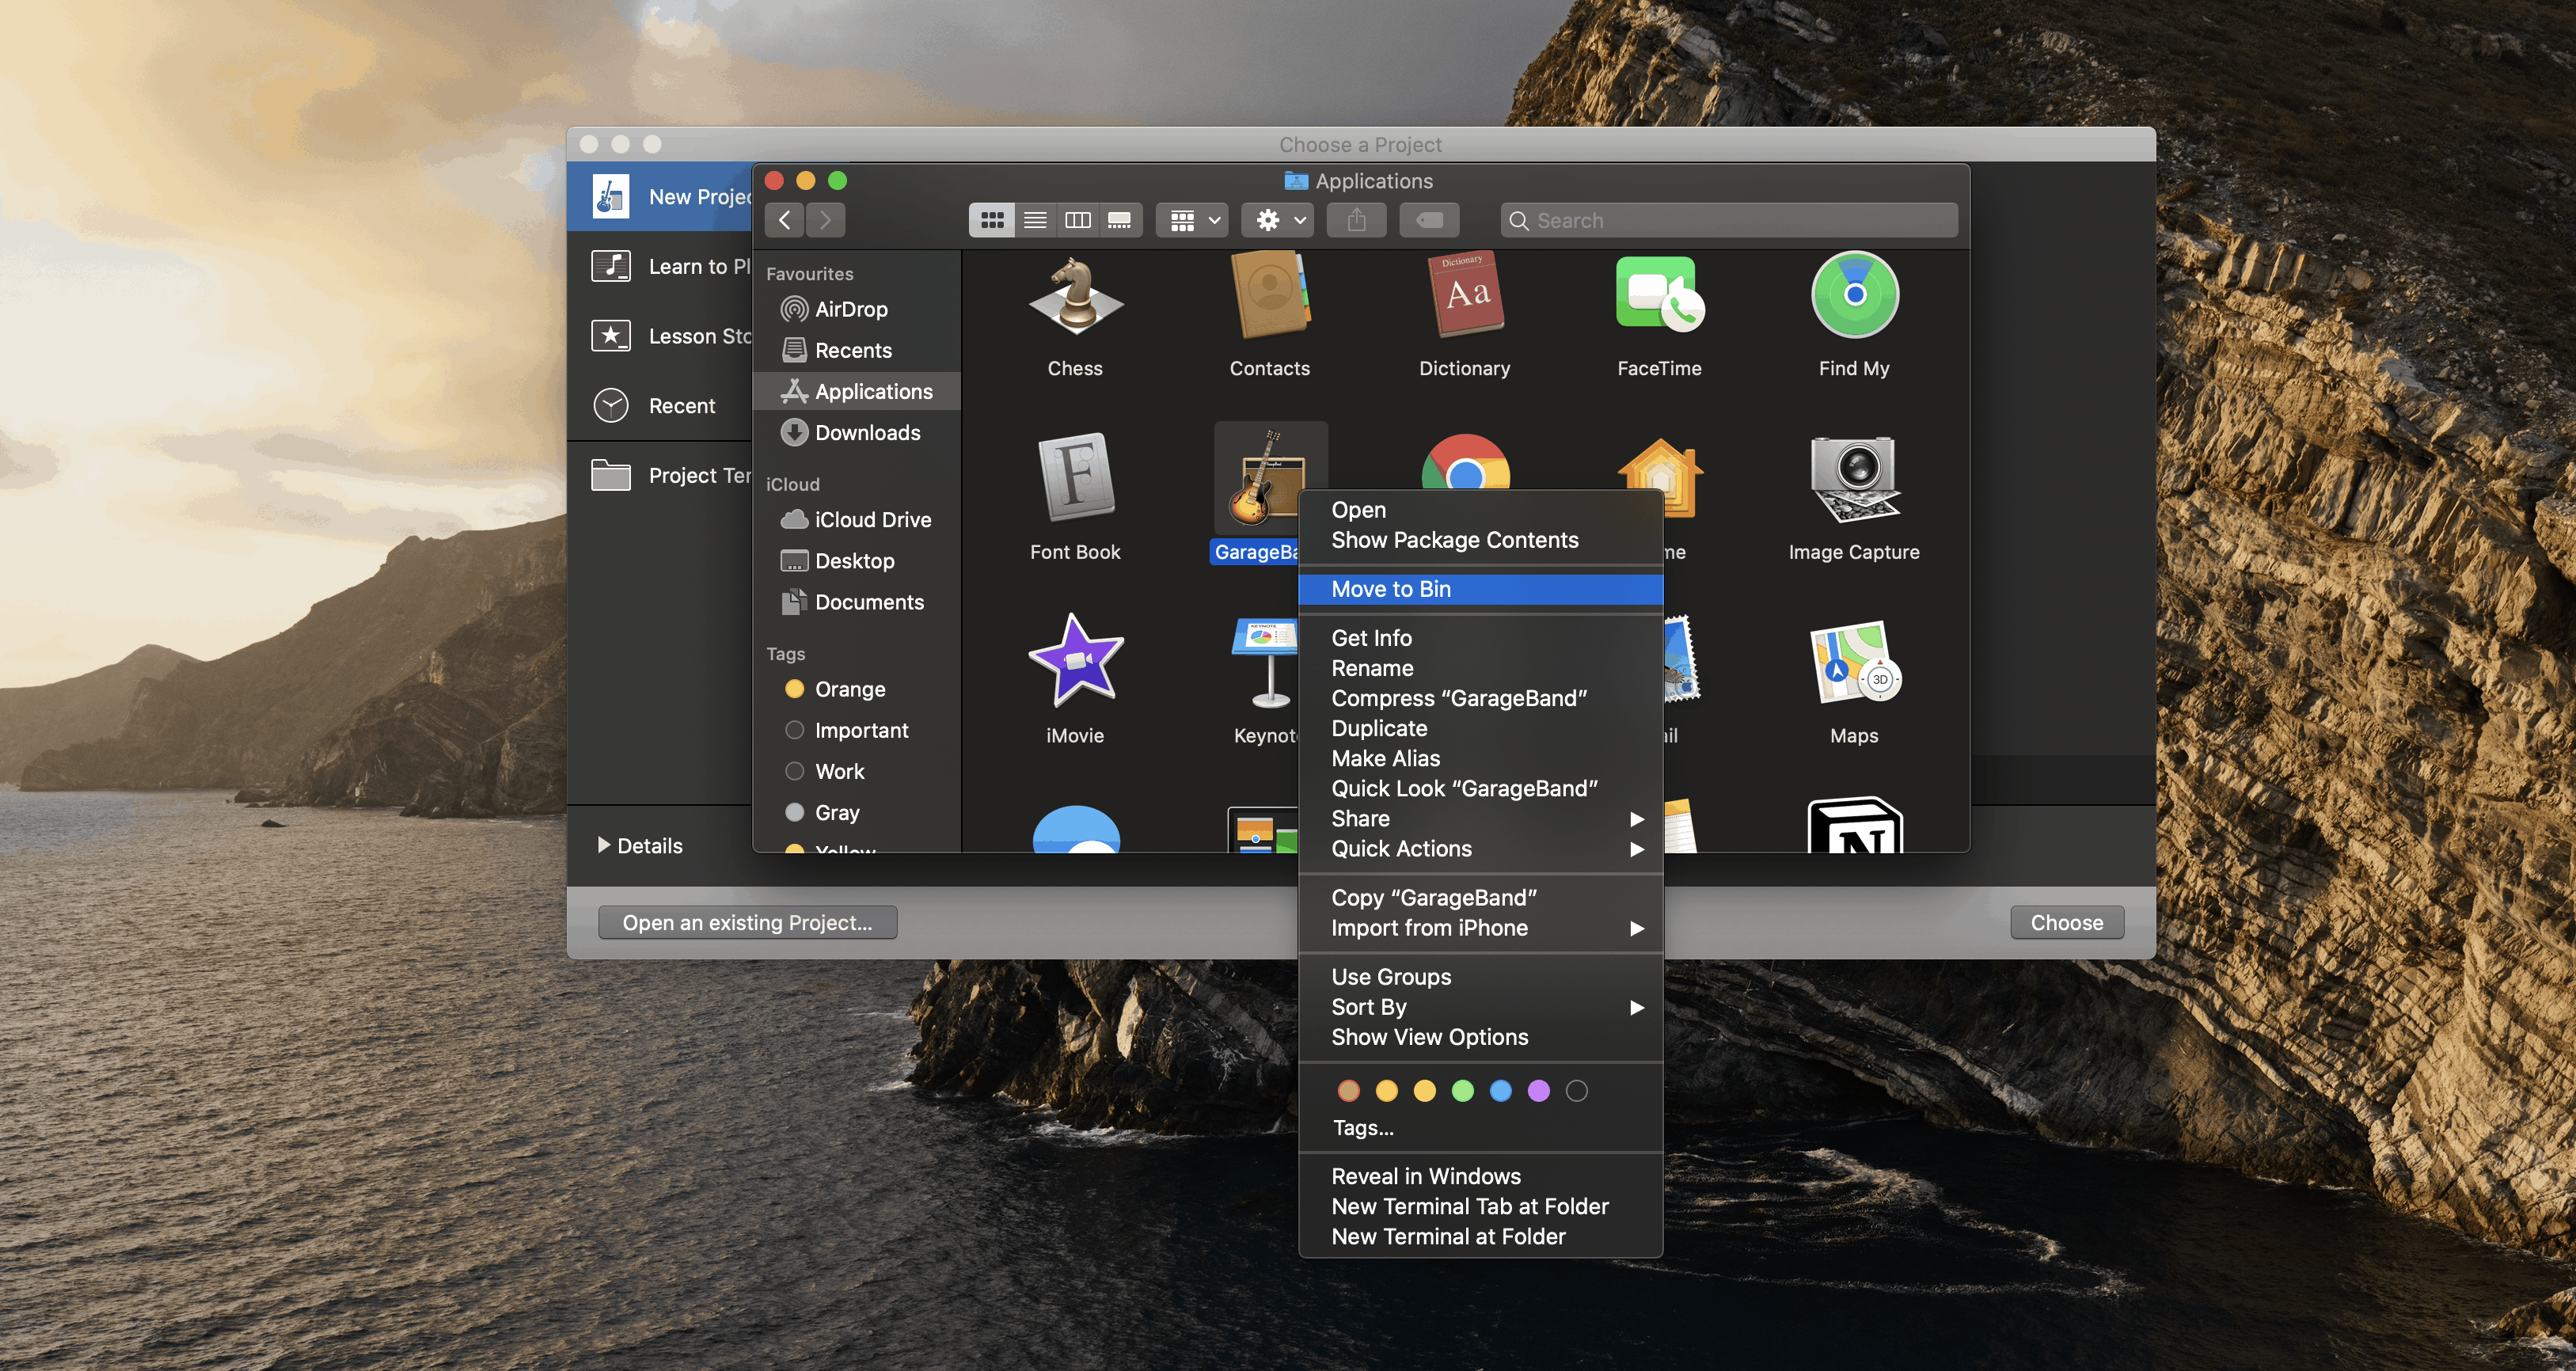
- Go to Finder and head to the /Applications/ folder.
- Locate “GarageBand for PC” and drag the icon to the Trash (or select the file and hit Command+Delete to send it to Trash).
- Recheck that the file is deleted by entering the admin password.
- Go to the Trash, confirm the GarageBand file is available. Choose “Empty” to free up space.

Now, with Mac OS X Mavericks these steps should work well to clean out the additional space. However, some versions of the Mac OS X require few additional steps to remove associated files:
- From the Finder, hit Command+Shift+G to summon Go To Folder, then enter: /Library/Application Support/GarageBand/
- Select and delete all files in the directory: /Library/Application Support/GarageBand/
- Empty the Trash once more.
- From the Finder, hit Command+Shift+G to summon Go To Folder, then enter: /Library/Application Support/GarageBand/
- Select and delete all files in the directory: /Library/Application Support/GarageBand/
- Empty the Trash once more.
How to uninstall GarageBand using AppCleaner?-
There is another, easier, and quicker way to delete GarageBand. A third-party app, AppCleaner, removes the app and all the associated files, simplifying the process.
- Launch AppCleaner. If not available, install the app.
- Go to /Applications/ and select GarageBand, drag and drop it into AppCleaner’s Dock icon.
- Select the app and choose “Delete” to uninstall GarageBand.
- When finished, close the AppCleaner app.
Using AppCleaner once can remove GarageBand sound library like the sample instruments and sound files stored and other associated files around the Mac OS X file system.
Once you have successfully uninstalled GarageBand and its associated files, a lot of free space will be available as a result. Also, if you are unsure whether you will need the app in the future, you may delete another file or app in its place. It is always easier to use a pre-installed application that comes with no cost involved.
Uff, thankyou, saved my ass- my mac is old liek a grandma and i am running on a little to no space, so i keep removing as many apps as possible so that my daily functioning can improve.